Pages

Monday, December 26, 2011

2011 Year In Review

I am borrowing this idea from my blog friend Mel at Junkin Junky, who recently posted a review of her projects for the year. She was right, I did more than I thought.  I started off 2011 by painting my sink backsplash in chalkboard paint:


I learned from Miss Mustardseed  how to work with dropcloth, and recovered my ottoman:


And made some ruffly pillows:


And curtains.


Then painted a shelf white, just leaving the top in a natural wood tone.  This would be a recurring theme for me in 2011.


Before I got on a roll with painting, I made a basket liner:


But then I painted my armoire:


And got my dad to build some shelves to fit inside:


And then I just got crazy painting.  A little kitchen shelf unit given to me by my friend Donna:


A cute little drysink also from Donna:


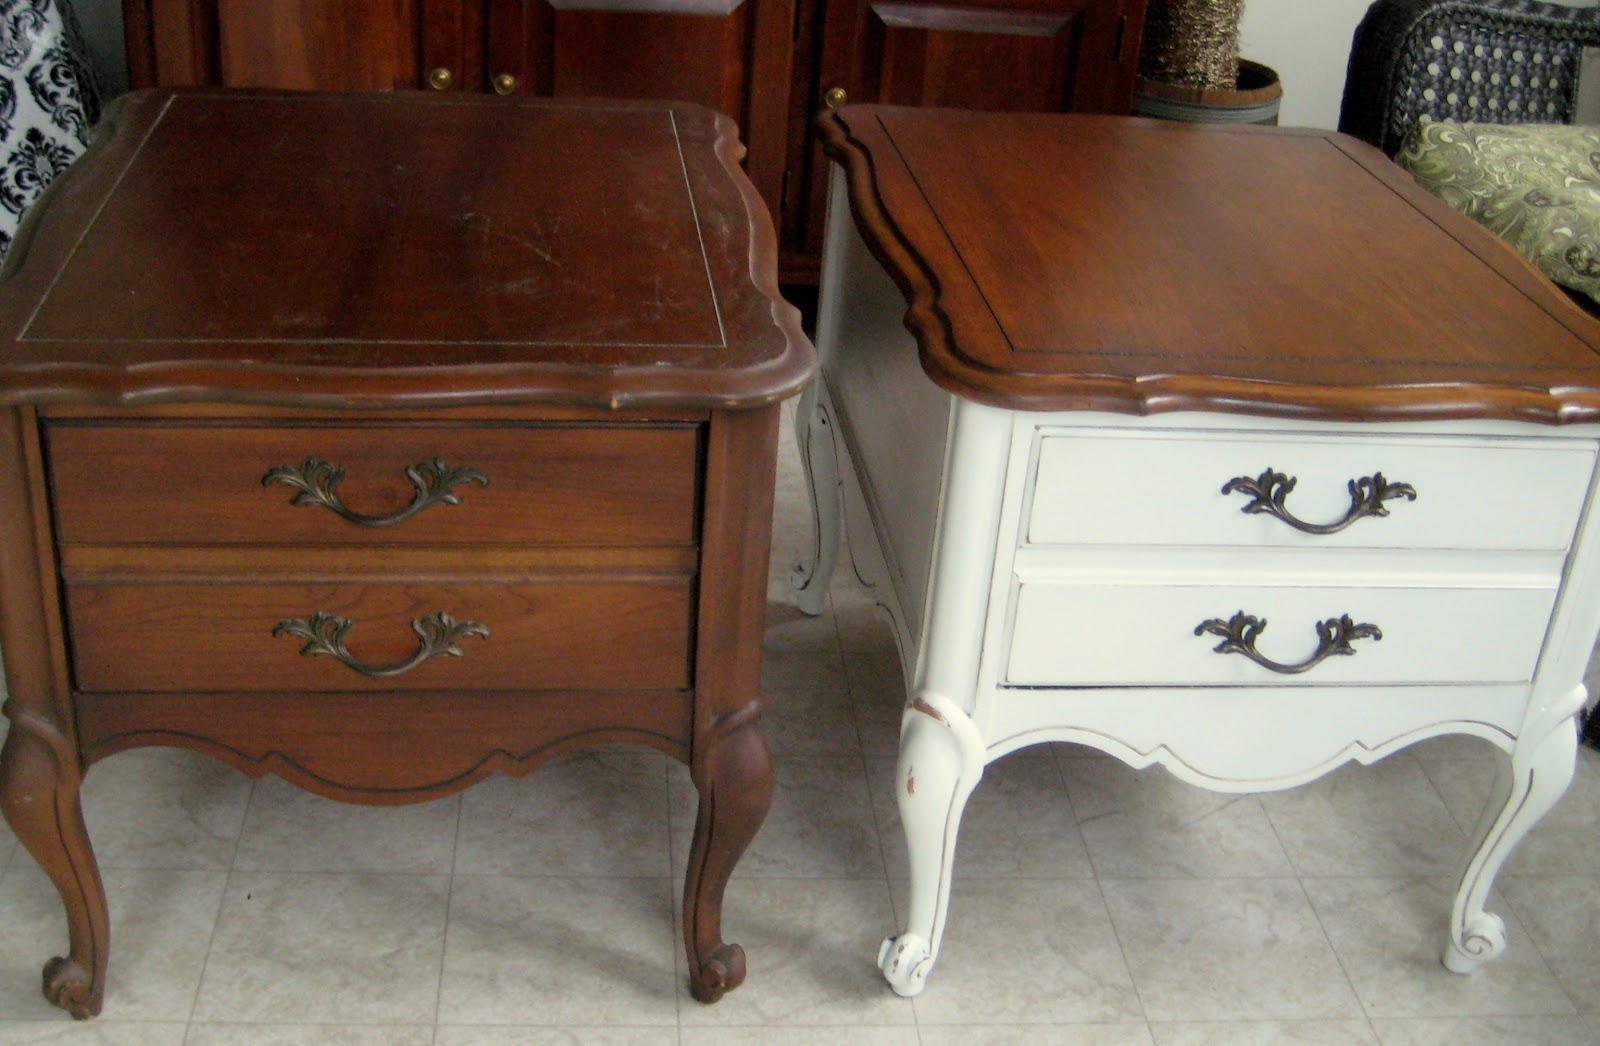
A pair of end tables from Craigslist:


A coffee table to match the end tables:


A pine hutch from my friend Donna:


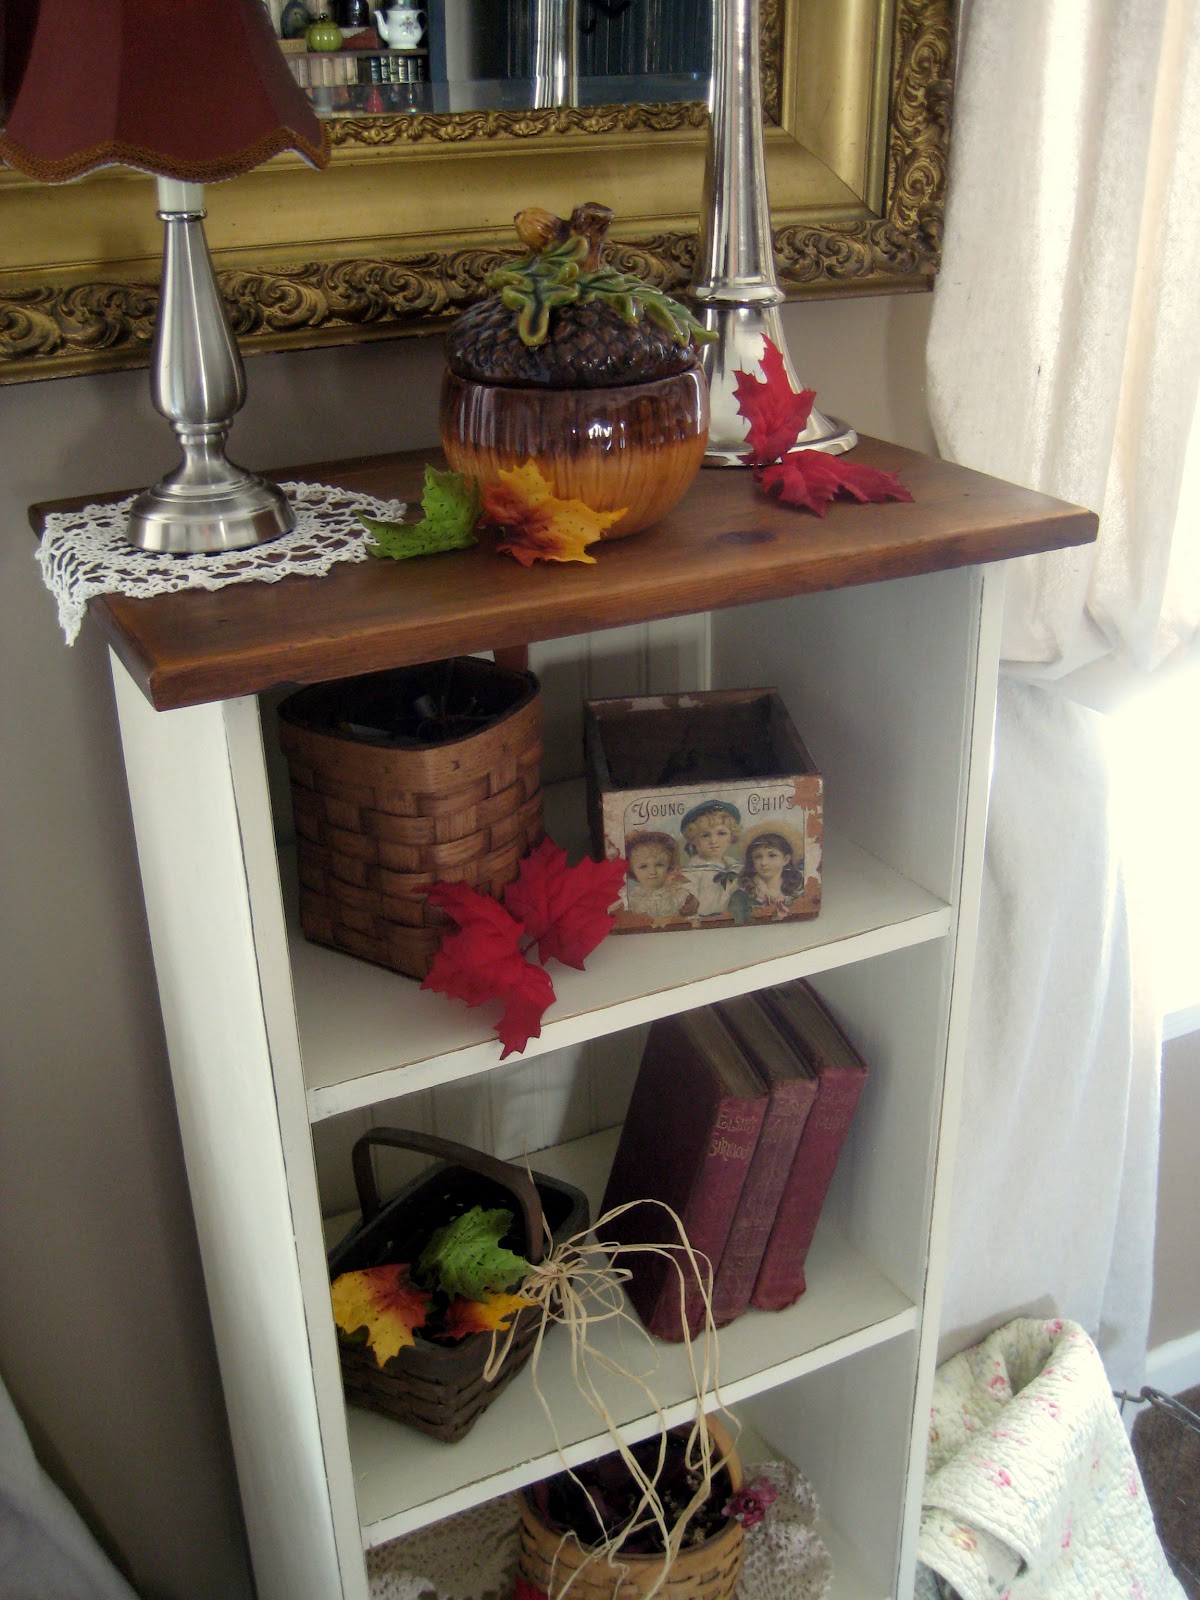
A little bookshelf I've had for years:


My antique vanity:


Taking a short break from the big projects, I made over a picture frame into a chalkboard, converted an electric candelabra to hold candles, and white-washed a picnic basket:


Then got started on my crazy beautiful french provincial dining room furniture.  Started on the server:


Got sidetracked and painted a dresser to use as a stand-in mantel for the upcoming holidays:


Painted a plate rack I got from my friend Michelle:


In my most popular post of the year, I took on Big Frenchy, the enormous china cabinet that is part of the dining room suite:


Got my dad to build me a centerpiece box, inspired by Anita at Far Above Rubies:


Got some help from my daughter finishing up the table and chairs:


Made a chair wreath (yes, still 3 more to do!)


For me that is quite a year.  I am not sure how I'm going to follow that up in 2012, but I plan to continue making my home a comfy little place.  I hope to be inspired by you and maybe inspire you in return.  Thanks for following along!

Linking up at Show & Tell Friday, Potpourri Friday and Feathered Nest Friday.  Happy weekend!

Friday, December 23, 2011

Christmas is Here!

Are your brown paper packages all tied up with string?  


I tend to start getting stressed out about the holidays right around Thanksgiving.  I dream that it's December 23rd and I have not started shopping yet.  It's like that dream where you are back in junior high and don't know your locker combination or your class schedule.  But here it is, December 23rd, and the gifts are wrapped and piled high around the tree, co-worker gifts were assembled and distributed, 30 dozen or so cookies have been baked, cards and packages have been mailed and by now should have been received.  I have a few "maybe I should have done" ideas lurking around the back of my brain, but I have decided that what is done is enough, and it is now time to relax and enjoy my family and be happy for what we have to share.  My Christmas wish for you is to have the same sense of contentment.


To paraphrase the immortal Charles Dickens, may Christmas find you light as a feather, happy as an angel, merry as a schoolboy.  May you honor Christmas in your heart and keep it all the year.  God bless us, every one!

Monday, December 19, 2011

Chair Wreaths and the Paint Fairy

I stole this idea from someone, but can't remember who.  If it's you, let me know and I'll link back!  I made this chair wreath for Christmas but it's so pretty I don't think I'll be taking it down after the holidays.  But I still need to make 3 more when I get the time.  I remember reading the person who did it bought a garland of faux boxwood greens and pulled all the stems off and wired them to a twig wreath.  I used a little wire form, which worked fine.  I used half the garland to make one, which isn't too bad if you have a coupon for the garland. It cost about $8-9 to make one with all the materials, which I think is worth it for how pretty they are.  My limited photography skills do not do this justice.


As you can see, all my painting is finally done on the dining room furniture, but I can't take all the credit.  With 2 1/2 chairs and a coat on the table bottom to go, I got totally burned out on painting and could not face finishing it.  I was finding any excuse not to paint.  Then the Paint Fairy came, and made everything right:


The Paint Fairy here being none other than my lovely and helpful daughter Amanda, who volunteered to go the distance and finish this never-ending project for me.  You may notice from the turquoise can in the pic that we painted the table and chairs in Martha Stewart paint rather than the ASCP that I used on the hutch and the server.  Because the chalk paint is sort of, well, chalky, I wanted to use something smoother on the pieces that would get touched pretty often.  Time will tell if that was a good decision.  From an aesthetic viewpoint, I don't think anyone will notice I used different paint.  I still didn't have to sand or prime, the Martha Paint stuck fine, though I will qualify that by saying the finish on this furniture was shot and I did clean it first with deglosser.  It did take more coats to cover than chalk paint, but all told we used about the same amount of paint, or maybe less, than we would have used in chalk paint.


Done!


Around the room:


With just a little much-needed assistance from the Paint Fairy.

Saturday, December 10, 2011

Trees v2011

I've been so busy this year working on my dining room project that I have not shared much of my Christmas decorating.  This year we have several trees.  Our main tree is traditionally decorated in our family ornament collection, which includes many homemade ornaments and things the kids made over the years.  It looks pretty much the same each year but that is ok, I enjoy the tradition of it and looking at the ornaments.  This year the kids decorated the tree the day after Thanksgiving.  Son-in-law Simon helped out.


As did youngest daughter Danielle, home from college for a few days:


Oldest daughter Stephanie:


All finished and lit up:


When the kids were younger I had them paint ceramic ornaments for the tree, and a few years ago we did it again as a fun project when they were young adults.  Some of the ornaments had little banners so you could add a holiday message.  Steph painted this one to commemorate her relationship with her then-boyfriend (now-husband) Simon:


Simon painted this one, which still makes us laugh each year when we get it out to put it on the tree:


In the kitchen I have a little corner tree.  I just bought this little tree last month and I love that it's all twiggy and scraggly looking like a Charlie Brown tree.


I added some Dollar Tree snowflakes, my vintage-style kitchen implement ornaments, and some cinnamon cut-outs that my mom made.  I think they suit my little kitchen tree perfectly.


Charlie Brown would approve, I think.


And lastly, my little dining room tree in silver pinecones and snowflakes.


That's it for 2011, maybe.  I have some ideas for changes but I may force myself to wait for 2012, in order to have more time to relax and enjoy the season, watching my favorite holiday movies, baking cookies, and hanging out with my girls.  A few of my favorite things, as the song goes.


The Box

Back before Thanksgiving I saw the most incredible centerpiece I'd ever laid eyes on at Far Above Rubies, and I knew I had to copy it.  If you didn't click the link, DO IT, it's gorgeous!  Interestingly enough, Anita copied hers from someone else, but personally I think she improved upon it.  I have not improved upon Anita's, but I still love mine and am continuing to tweak it.  Here is my Christmas version.  (Anita has a Christmas version too, here.)


I started with some wood which I gave to my dad with some vague instructions on Thanksgiving, and a week later he handed me this:


Perfect.  Thanks dad!  I sanded it a bit and stained it, put some pads on the bottom and then started playing around with filling it, which turned out to be challenging. While Anita used fresh greens and lots of candles, the majority of my greens are faux, with just a few real ones tucked in for variety, and a central candle.  I looked around a couple nurseries for fresh clippings and just didn't find what I wanted, so I pulled apart a couple of swags from Michaels and did my best. I still may add a few candles.


I used natural elements like the pine cones but also added some glittery picks and ornaments for sparkle.  I found that the key to success was having a lot of greens with different textures and tones, making sure that some had a trailing effect, and then piling everything else in til it looked like too much, and taking just a little out.  I haven't taken time to set the table as I'm still painting the legs, but as you can barely see in my photos, I refinished the table top.  Hopefully the whole room reveal will happen before next Christmas.


Have a great week!  I am linking up to Metamorphosis Monday and The Sunday Showcase.

Related Posts Plugin for WordPress, Blogger...